


Starting a website can feel like a big task, but it doesn't have to be complicated. Whether you're launching a business website, creating a personal blog or promoting an event, this guide will walk you through everything you need to know.
The best part? When building a website from scratch, you don't need any coding or design experience to get started. With modern website builders like Ucraft Next, Wix, and Shopify, you can create, run, and grow a professional web presence without dealing with any technical complexities.
If you're wondering how to make your own website, we've broken down the process into simple, manageable steps that will take you from idea to live website.
Step 1 - Define your website goal
Before you dive into designing a website from scratch, take a moment to get clear on what you want your website to achieve. Your website's goal will shape every decision you make - from the platform you choose to the features you'll need.
Think of your website goal as your North Star. It will guide your choices about design, content, and functionality. Are you looking to sell products online? Share your expertise through a blog? Or maybe showcase your creative portfolio?
Here are some common website goals to consider:
-
Sell products or services through an online store
-
Generate leads for your business
-
Share knowledge through a blog or educational content
-
Display your work in a portfolio
-
Build an online community
-
Promote your physical business
-
Accept bookings or appointments
-
Create a personal brand
-
Sell event tickets or collect RSVPs
-
Conduct surveys or collect feedback
-
Drive awareness for a cause
-
Host a forum for discussions
-
Provide a platform for user-generated content
-
Share multimedia content like videos, podcasts, or galleries
-
Run membership-based platforms with exclusive content
-
Collect donations for a cause or non-profit
Remember, your website can serve multiple purposes, but it's important to prioritize your main goal. This will help you stay focused and make better decisions throughout the building process.
Step 2 - Choose your website builder
Now that you’re clear on your goal, it's time to pick the right platform to bring it to life. Website builders are platforms that let you create a website without writing code. They come with drag-and-drop editors, pre-designed templates, and built-in features that make the process simple.
Every website builder has its strengths, so your choice should match your goals. Here's what to consider:
-
Ease of Use
Look for a platform with an intuitive interface that makes sense to you. Most builders offer free trials - use them to test how comfortable you feel with the editing tools.
-
Features and Flexibility
Different builders specialize in different types of websites. For example, if you're building an online store, you'll want a platform with strong eCommerce features. If you're creating a portfolio, look for builders with great image galleries and design options.
-
Templates and Design Options
Check out the available templates for your industry. A good template can save you hours of design work and ensure your site looks professional from the start.
-
Pricing and Plans
Consider your budget and what features you get at each price point. Remember to factor in costs like domain names and any premium features you might need.
-
Growth Potential
Think about your future needs. Can the platform grow with your business? Make sure it offers the flexibility to add features as your website expands.
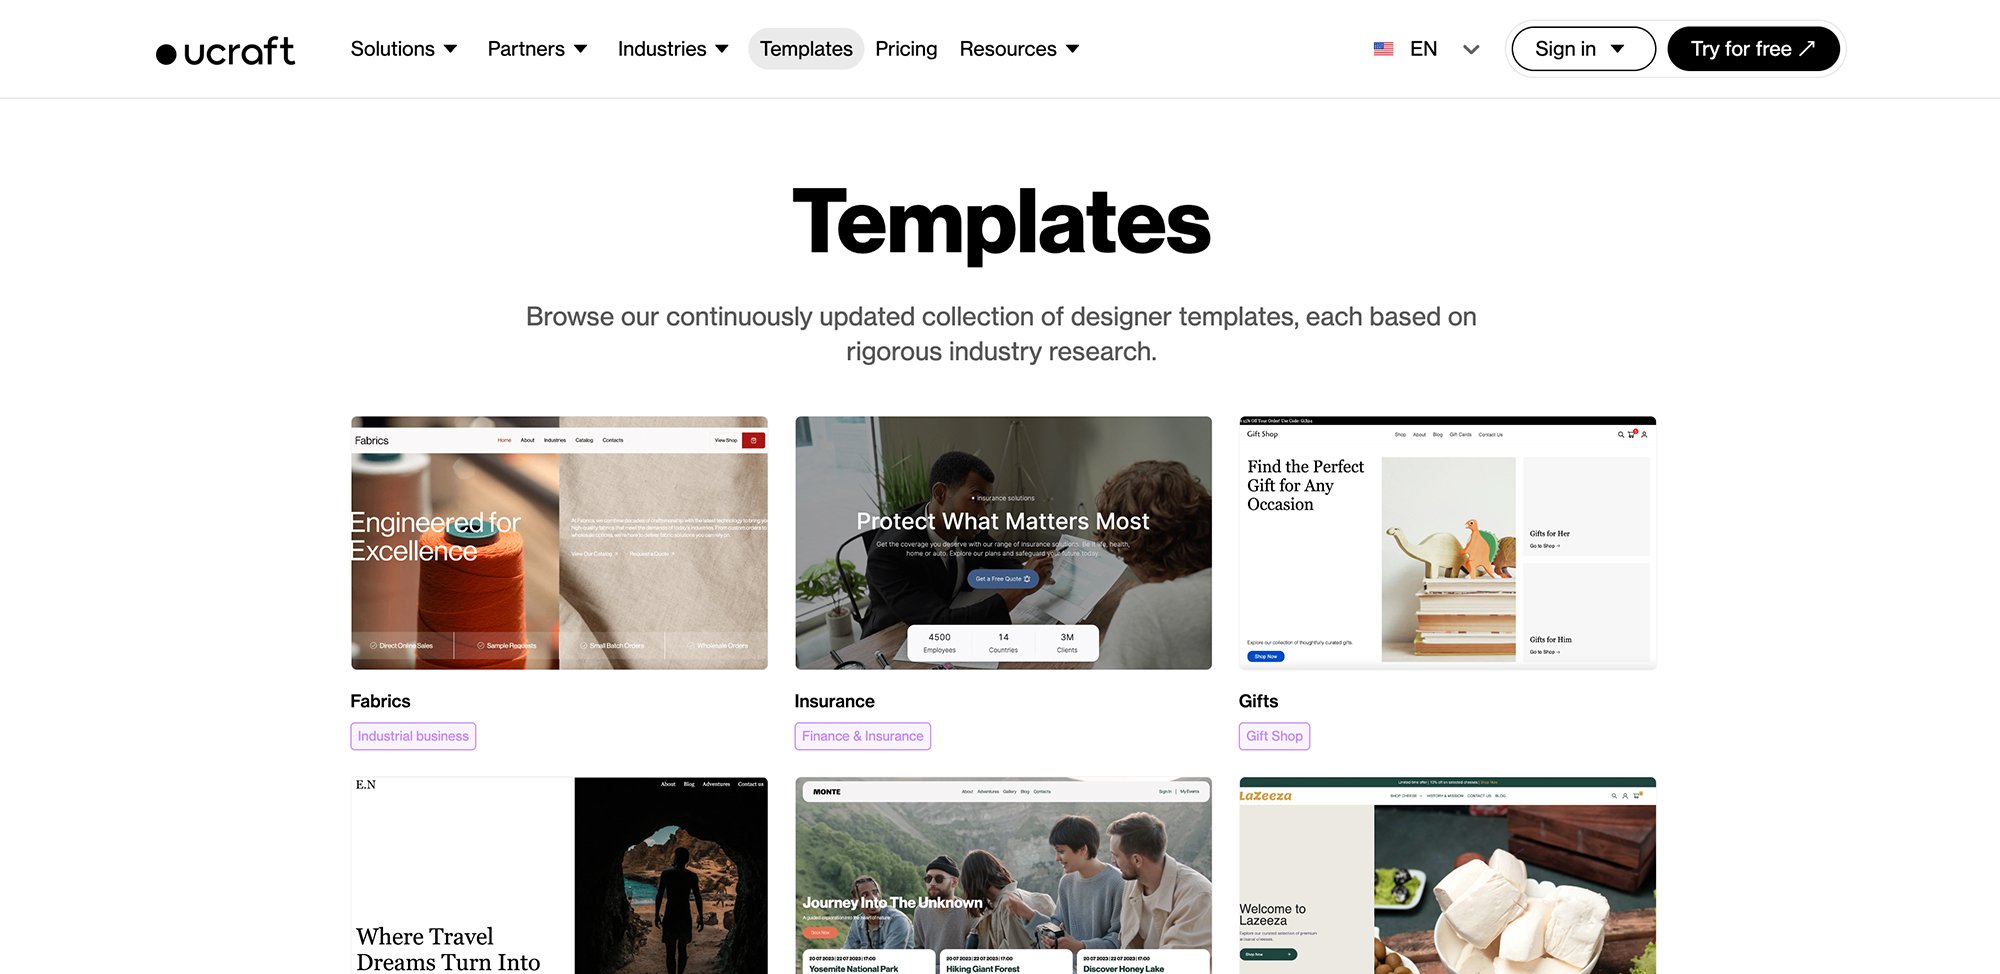
Step 3 - Choose your template
A template (or theme) is your website's starting point - think of it as the foundation of your site's structure and layout.
It's a pre-designed framework that comes with ready-to-use pages, sections, and features specifically arranged to create a complete website. The best part? You can customize every element to match your brand. Here's how to choose the right template:
-
Focus on Structure, Not Style
While colors and images might catch your eye first, don't let them drive your decision. Pay attention to the layout and functionality instead. Remember: you can easily change colors, fonts, and images later, but restructuring your entire layout is much more challenging.
-
Look for Built-in Features
Check what features come with the template. If you're building an online store, look for templates with product galleries, shopping cart integrations, and checkout pages. For a restaurant website, you might want built-in menu displays and booking systems.
-
Consider Your Industry
Many website builders offer templates designed specifically for different industries. These aren't just about looks - they're based on research about what works best in your field. For example, Ucraft's industry-specific website templates are built on extensive research about user behavior and conversion patterns in different business sectors.
-
Check Mobile Responsiveness
Make sure your template looks good on all devices. While most templates are mobile-responsive, some handle it better than others. Preview the mobile version before making your final choice.
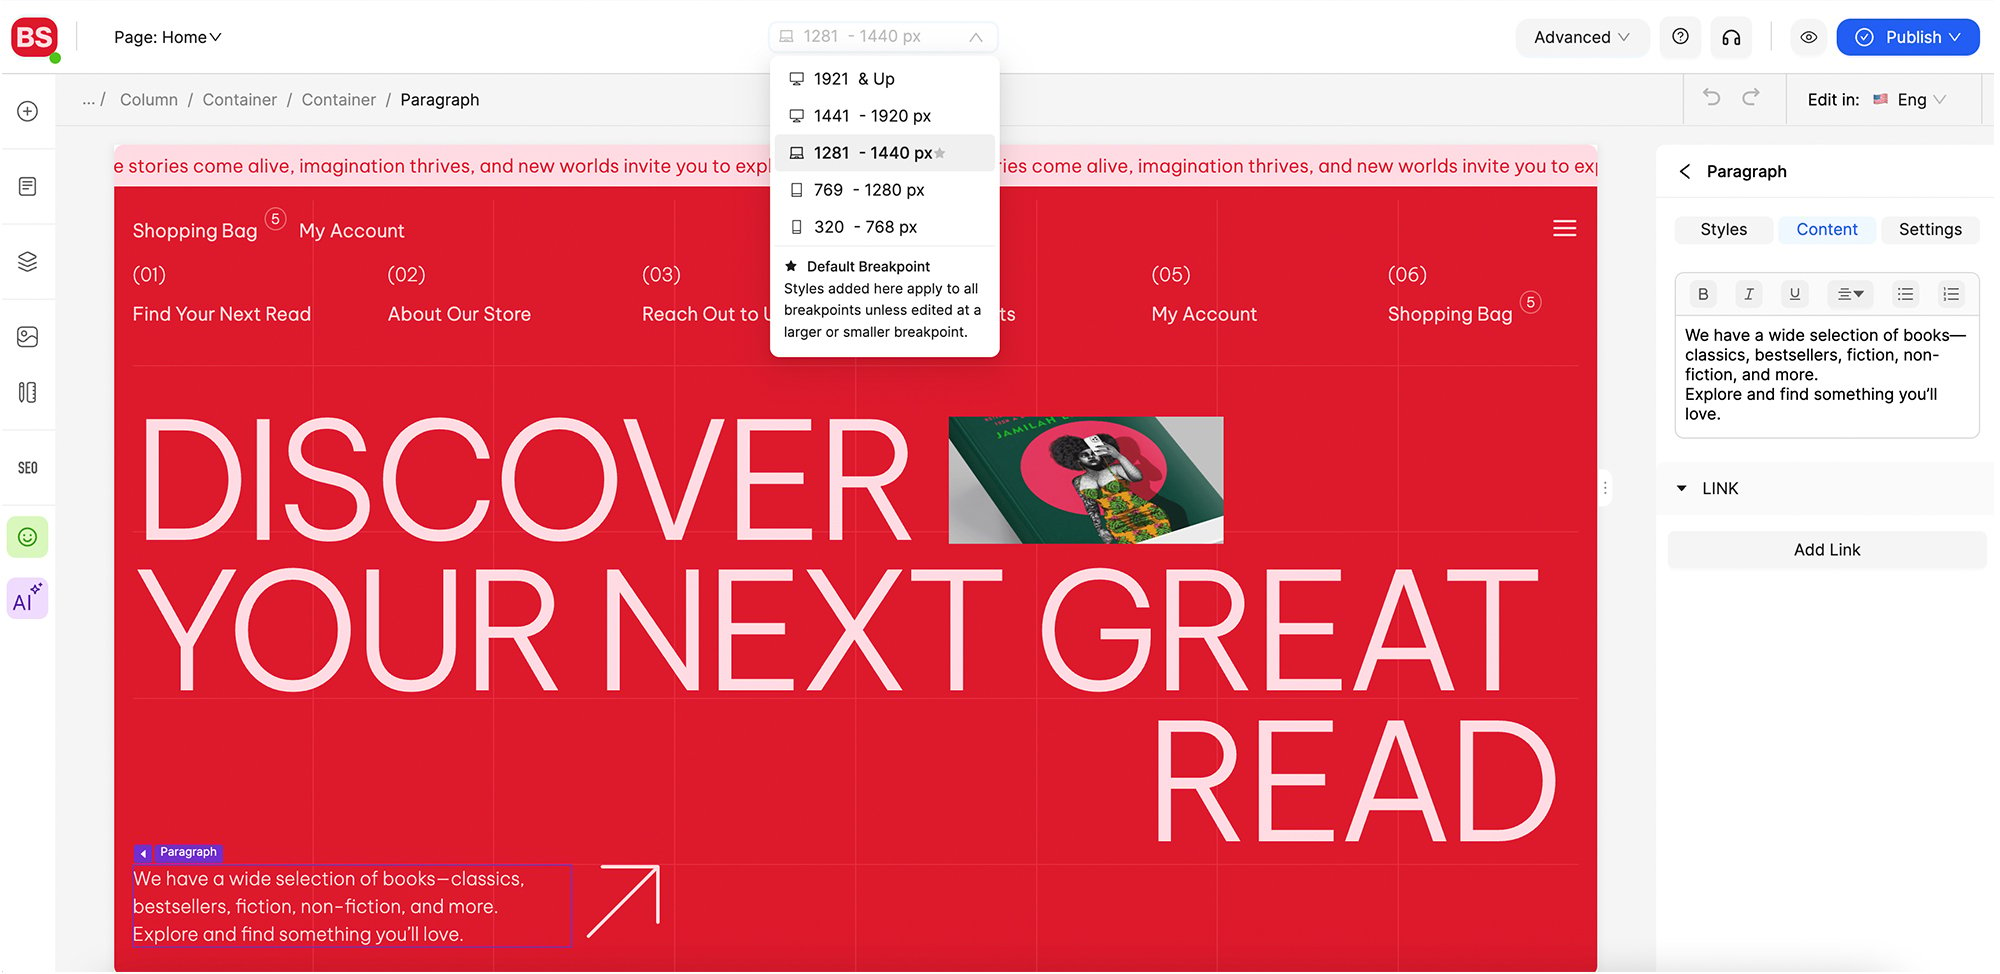
Step 4 - Customize Your Design
Now comes the fun part in our step by step how to make a website guide - making the template truly yours. Most advanced web builders come with drag-and-drop editors such as Ucraft Next’s Design Mode, making this process simple and straightforward, but it's important to stay organized and focused on your goals. Here are the main steps you need to take when tailoring the template to your brand:
-
Upload your logo (and if you don’t have one, design it in minutes with Ucraft’s free AI logo generator)
-
Set your brand colors
-
Prepare your images
-
Make buttons and links clearly visible
-
Make sure buttons are large enough to tap on mobile
-
Check that images scale properly
-
Organize your pages in a logical order
-
Use consistent styling across all pages
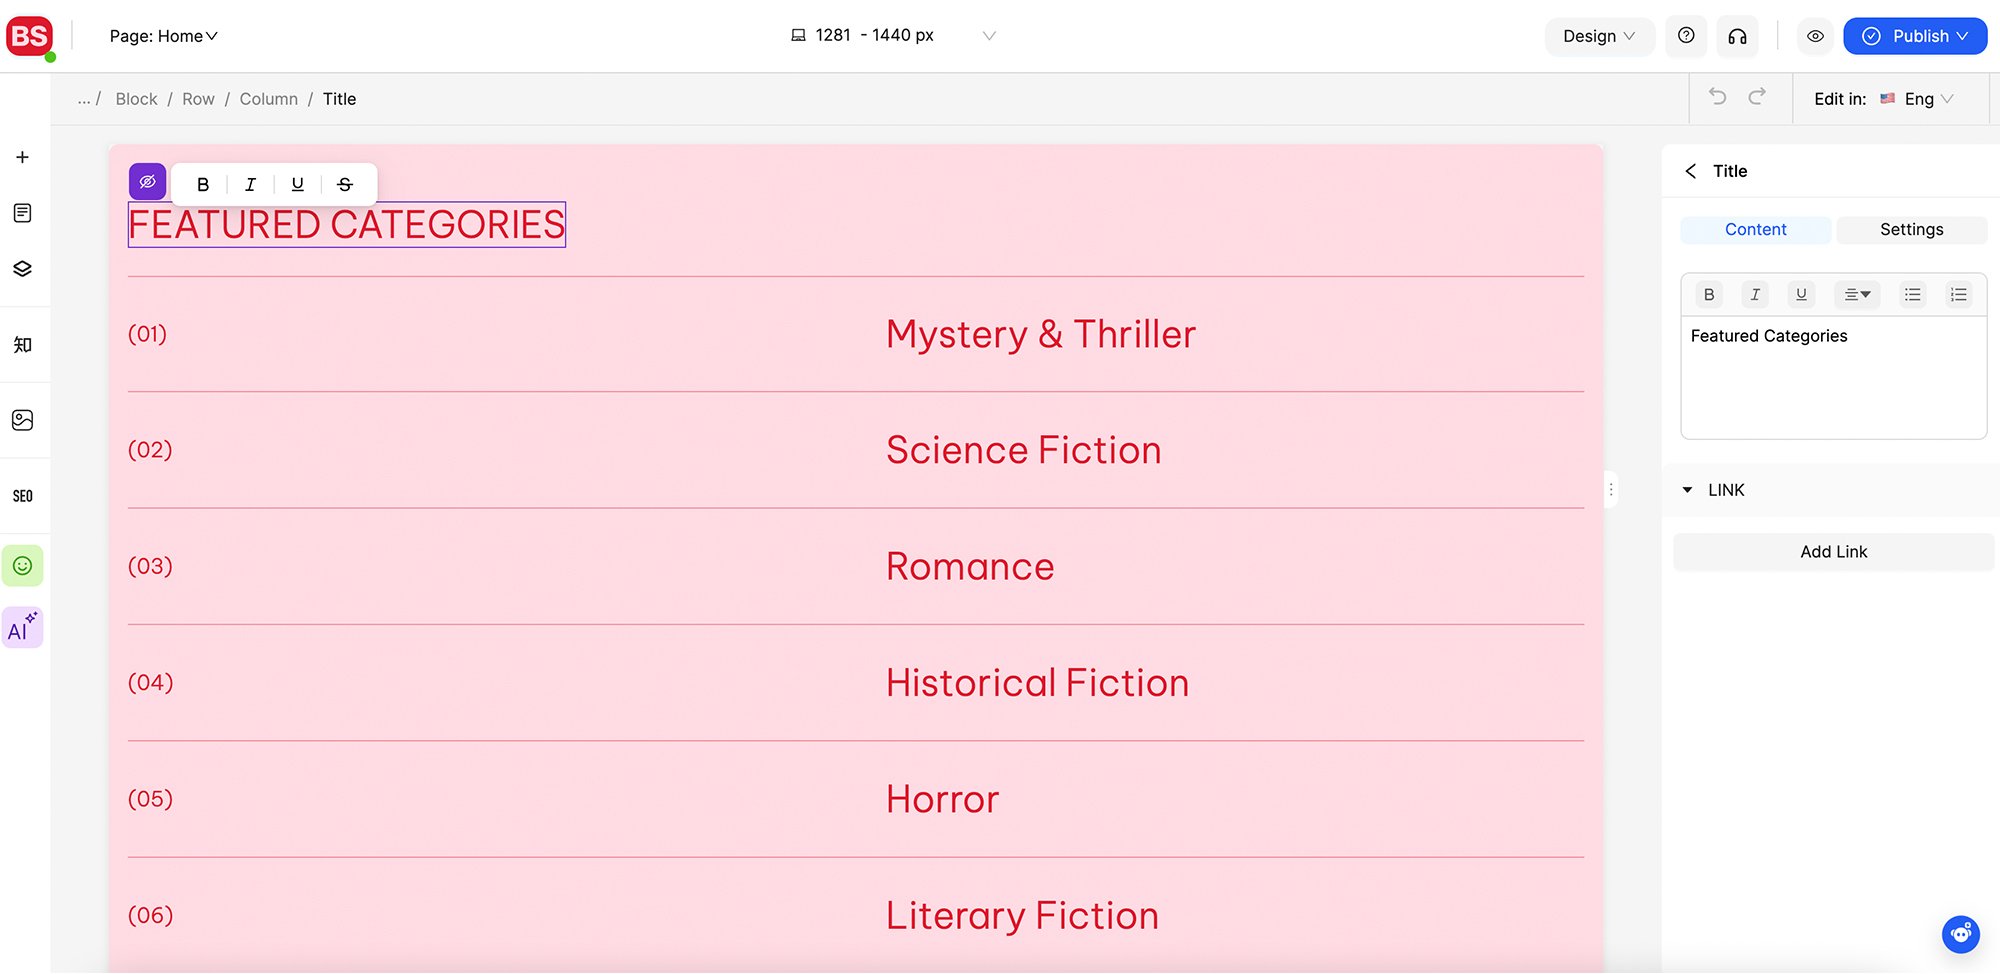
Step 5 - Add and Organize Your Content
High-quality content is what turns browsers into leads, customers, and followers. Luckily, modern website builders provide user-friendly Content Editor that will make your job easy.
Here's how to create and organize content that engages your audience and helps achieve your website goals:
Essential Pages Every Website Needs
-
Homepage: Your site's front door - make it clear what you offer and why visitors should care
-
About: Tell your story and build trust with your audience
-
Products/Services: Clearly describe what you offer
-
Contact: Make it easy for people to reach you
-
Privacy Policy and Terms: Legal pages that protect you and your users
Content Tips for Better Results
-
Update your content regularly to keep it fresh
-
Use high-quality images that match your brand
-
Include trust signals like testimonials or reviews
-
Add contact information in multiple places
-
Create content that answers your customers' questions
-
Use action words in your buttons and links
Step 6: Set Up Essential Features and Functionality
Your website needs more than just good looks - it needs powerful features that help visitors take action. Let's focus on the most important functionality to set up right away.
Start with a robust contact system. Create a clean, simple contact form with just the essential fields - typically name, email, and message. Set up email notifications so you never miss an inquiry, and add spam protection to keep your inbox clean. Consider adding a quick contact option in your footer for easy access.
Navigation is crucial for user experience. Your main menu should clearly reflect your site's structure and help visitors find what they need quickly. If your site has lots of content, add a search function and breadcrumbs to help people navigate deeper pages.
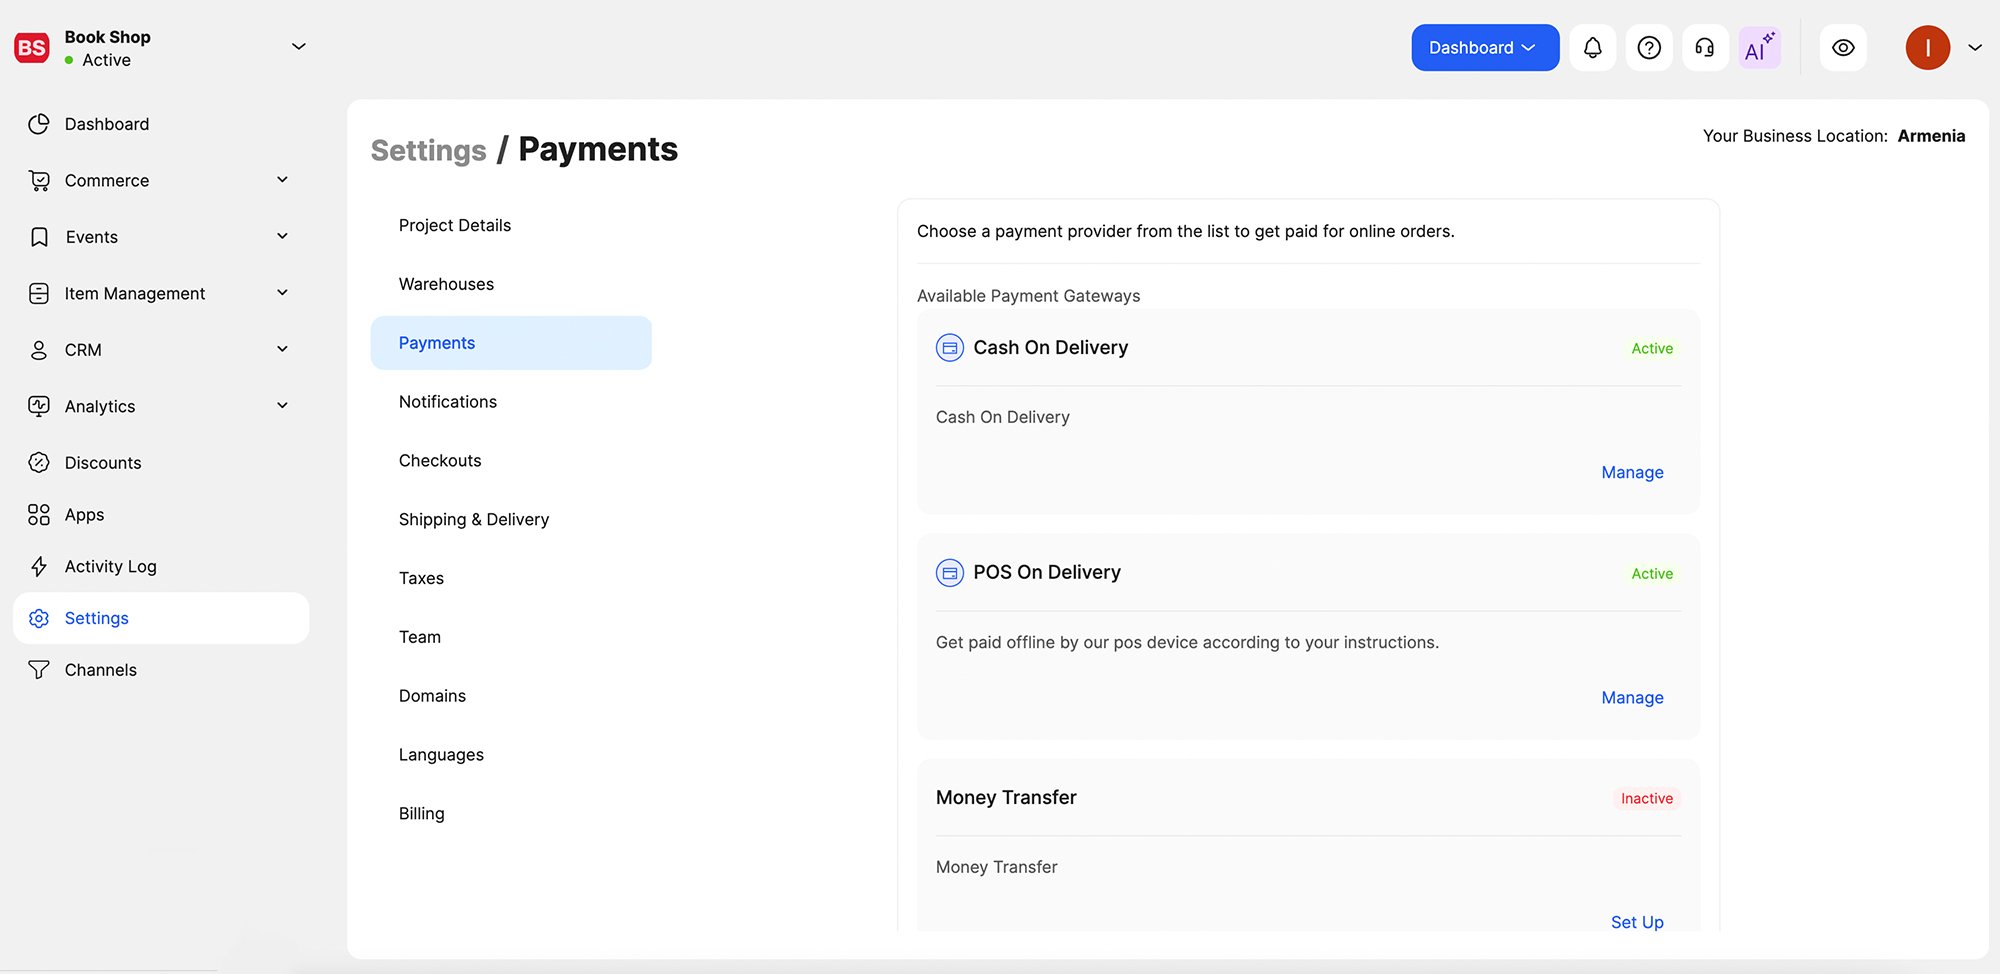
Next, set up your essential integrations. Connect Google Analytics to understand your visitors' behavior, link your email marketing service to grow your subscriber list, and add social media connections to build your community. If you're running an online store, make sure your payment processing is secure and thoroughly tested.
If you plan to sell products or services, make sure to set up your payment and delivery systems. Once again, a robust website builder can make this process super fast and straightforward. Ucraft Next, for instance, comes with an all-in-one eCommerce website builder comes with all the tools you need to add dozens of different payment gateways (including globally accepted ones like PayPal and Stripe) and delivery methods, so you can start selling online within hours.
On the technical side, ensure your site is secure with an SSL certificate (that's the 'https://' in your web address). Configure your domain name and business email, set up automatic backups to protect your content, and create a custom 404 error page to help lost visitors find their way. Don't forget to optimize your images and add meta descriptions - these small details make a big difference in how well your site performs.
Step 7: Choose and Set Up Your Domain
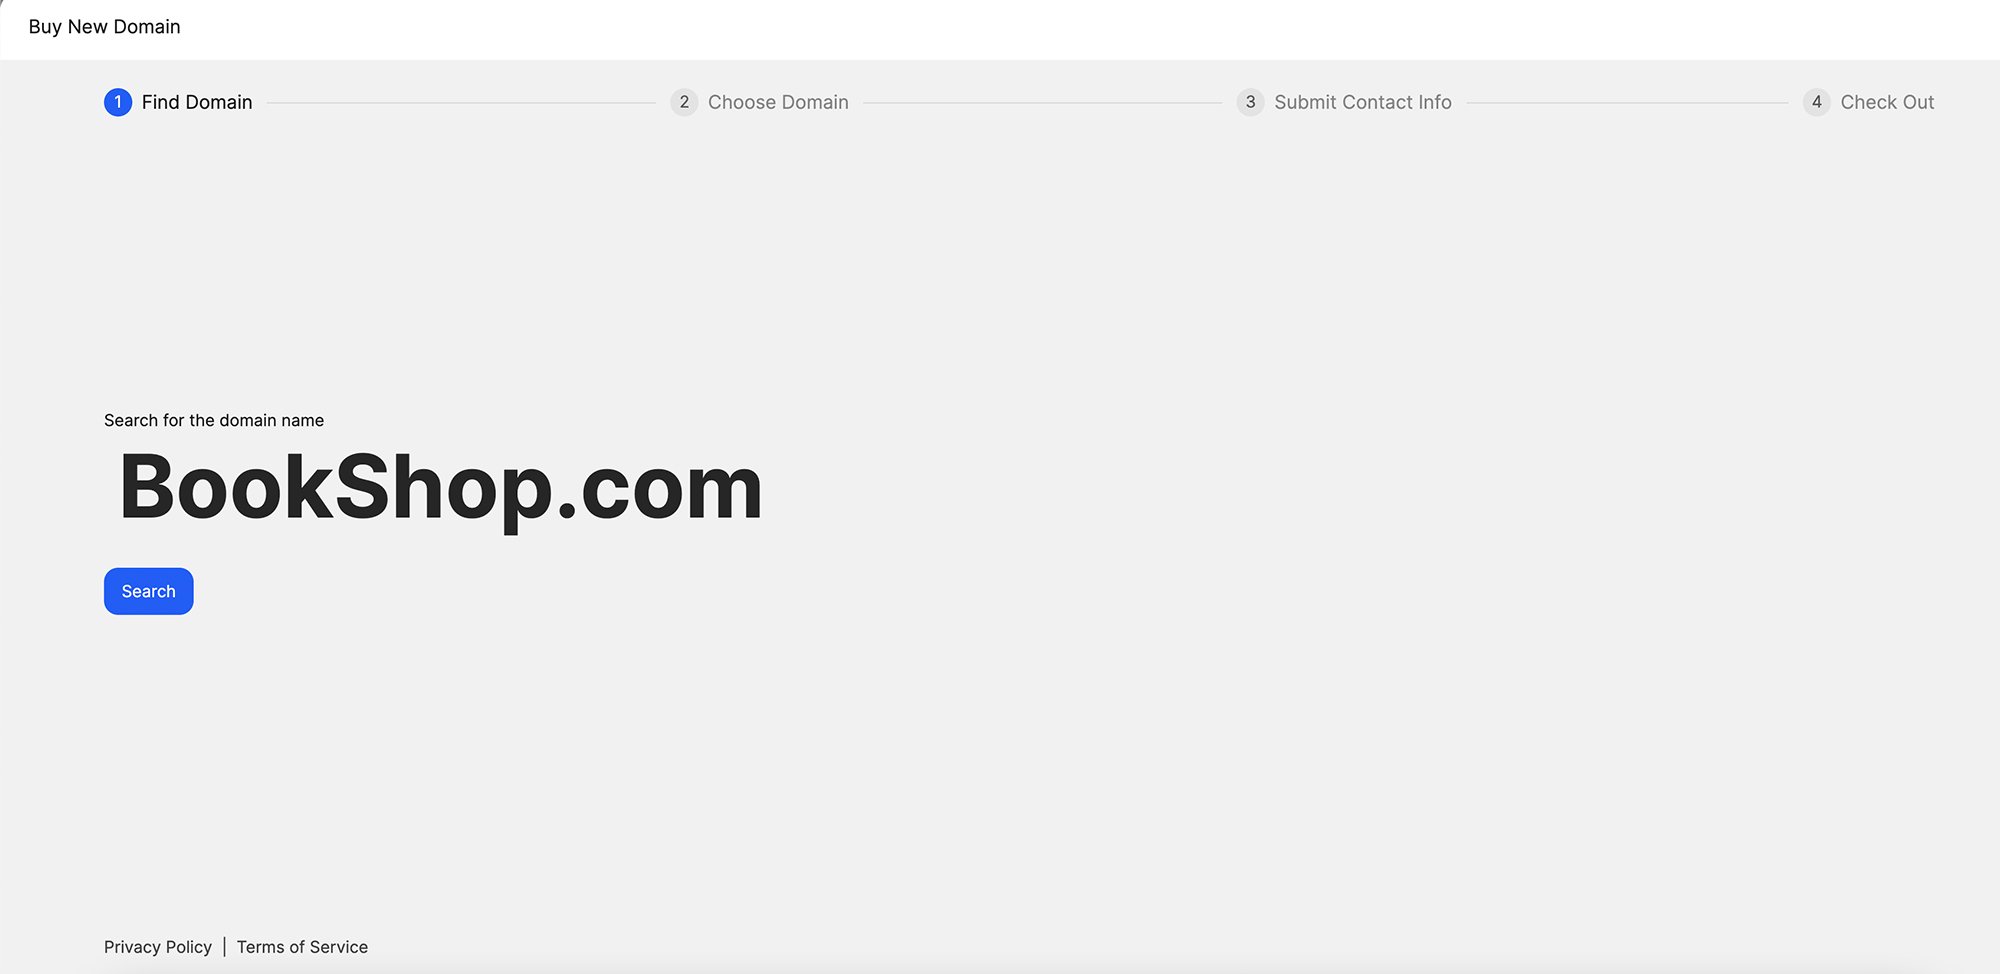
Your domain name is your website's address on the internet - it's what people type to find you online (like www.yourcompany.com). A good domain name can make your website more searchable and professional - here are some tips for coming up with a relevant domain name.
-
Keep it simple and memorable.
-
Use your business name if possible, or choose something that clearly relates to what you do.
-
Avoid hyphens, numbers, or complicated spellings that people might mistype.
-
Keep it as short as possible - short domains are easier to type and remember.
Most website builders offer domain registration as part of their packages. You can either buy a domain through your website builder (usually the easiest option) or purchase it separately from a domain registrar. Expect to pay around $10-15 per year for a standard .com domain.
Once you've chosen your domain, you'll need to connect it to your website. If you bought your domain through your website builder, this usually happens automatically. If you purchased it separately, you'll need to update your domain's DNS settings - don't worry, most website builders provide step-by-step instructions for this.
Pro tip: Even if you're not ready to launch your website yet, consider buying your domain name now. Good domain names can get taken quickly, and securing yours early ensures you won't lose it to someone else.
Step 8: Test and Launch Your Website
Before you share your site with the world, you need to make sure everything works perfectly. Here's how to test your website effectively and prepare for launch.
Start by checking your site on different devices and browsers. What looks perfect on your laptop might need adjusting on mobile phones or tablets. Pay special attention to how images display, how buttons respond to clicks or taps, and whether your forms submit correctly.
Testing is more than just clicking around. Make sure all your links work, including menu items and buttons. Fill out your contact forms and verify you receive the submissions. If you have an online store, complete a test purchase to experience your checkout process firsthand.
Check all your content carefully. Look for typos, formatting issues, or placeholder text you might have missed. Make sure your images load quickly and your pages don't take too long to appear. If you've added features like a newsletter signup or chat widget, test these thoroughly too.
Once everything works smoothly, preview your website using your website builder's preview function. This shows you exactly how your site will look when it's live. Share this preview link with friends or colleagues for feedback - fresh eyes often catch things we miss.
Ready to launch? Double-check your domain settings, make sure your SSL certificate is active for security, and hit that publish button. But remember - a website is never truly "finished." Plan to regularly update your content, monitor your analytics, and make improvements based on how visitors use your site.
Step 9: Optimize for SEO and Accessibility
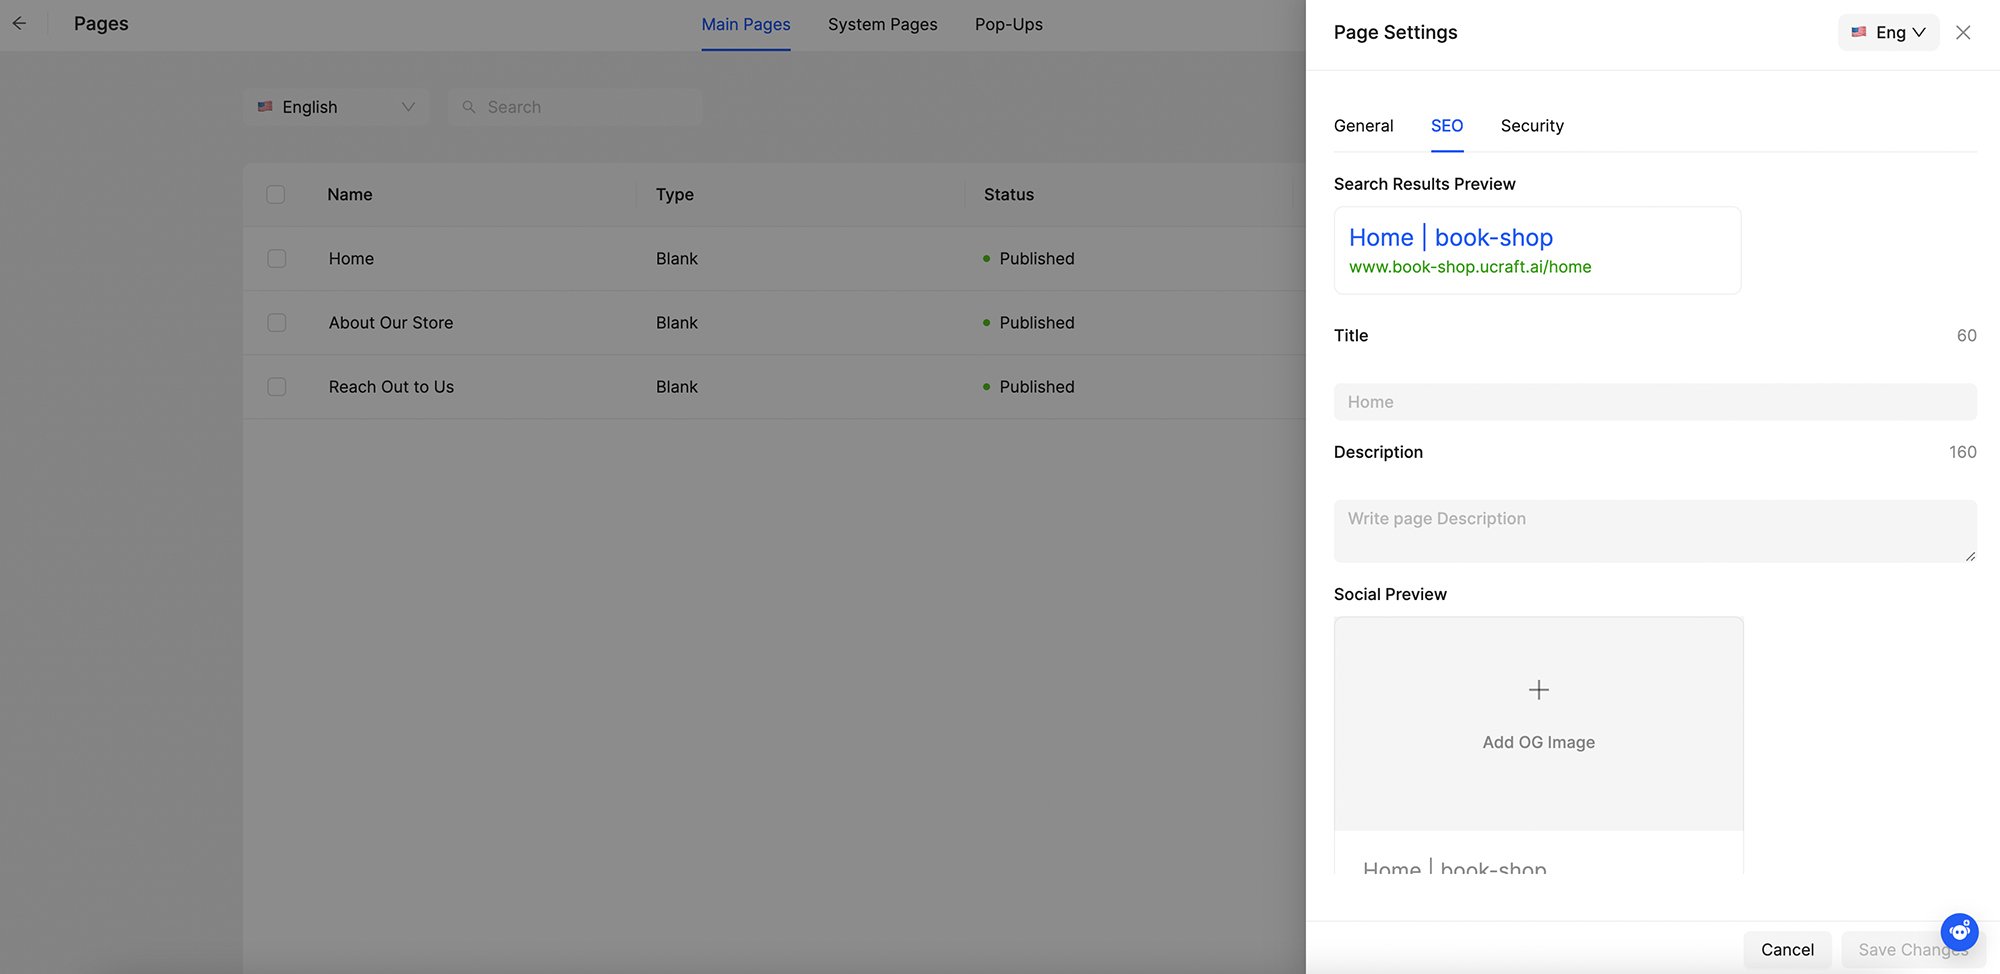
Once your website is live, it’s crucial to make it visible to search engines and accessible to all users. Here's what to focus on:
-
Research and use relevant keywords in your meta title, meta description, headings, and throughout your content.
-
Optimize image file names and use alt text for better search visibility and accessibility.
-
Create an XML sitemap and submit it to search engines like Google.
-
Use descriptive and SEO-friendly URLs.
-
Focus on site speed by compressing images and leveraging caching.
-
Build backlinks to improve domain authority.
Step 10: Analyze and Improve
Once your website is running, regularly analyze its performance to identify areas for improvement.
-
Use Google Analytics to track metrics like page views, bounce rate, and conversion rate.
-
Conduct A/B testing to compare different versions of pages or features.
-
Gather user feedback through surveys or feedback forms.
-
Continuously refine your site based on the data you collect to enhance user experience and achieve your goals.
Bringing it all together
Learning how to make a website from scratch is an achievable goal for anyone willing to follow a clear process. By breaking it down into manageable steps - from planning to launch and optimization - you can build a professional web presence that serves your goals and connects with your audience.
This process becomes even more straightforward with Ucraft Next, which removes traditional technical barriers through intuitive design tools and researched templates, letting you focus on what matters most - your content and message. Ready to start? Set up your free website today and see how simple it can be.